Print Back
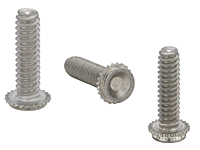
These studs ensure permanent mounting in metal sheets as thin as .062 in.

The fastener head is locked securely in a blind, milled hole and is able to handle substantial loads. The concealed-head feature allows the side of the sheet opposite installation to remain smooth.

Sheet preparation only requires a milled blind hole to the recommended minimum depth. Center-cutting end mills for hole preparation are available from PennEngineering. Installation of the concealed-head studs and standoffs is simple using a hollow anvil and solid punch. Place the head of the fastener in the hole and insert using any standard press. Displaced sheet metal flows smoothly around the head into the undercut.
Concealed head studs- CFHA, CFHC, CHA, CHC
Concealed-Head Studs - Types CHA,CFHA,CHC,CFHC 2
Unit of Measure
Items Concealed head studs- CFHA, CFHC, CHA, CHC
CHA-440-4
Concealed-Head Studs - Types CHA,CFHA,CHC,CFHC - Unified
Concealed head studs- CFHA, CFHC, CHA, CHC
CHA-632-4
Concealed-Head Studs - Types CHA,CFHA,CHC,CFHC - Unified
Concealed head studs- CFHA, CFHC, CHA, CHC
CHA-832-4
Concealed-Head Studs - Types CHA,CFHA,CHC,CFHC - Unified
Concealed head studs- CFHA, CFHC, CHA, CHC
CHA-440-6
Concealed-Head Studs - Types CHA,CFHA,CHC,CFHC - Unified
Concealed head studs- CFHA, CFHC, CHA, CHC
CHA-632-6
Concealed-Head Studs - Types CHA,CFHA,CHC,CFHC - Unified
Thread Size N/A .112-40 (#4-40) N/A .138-32 (#6-32) N/A .164-32 (#8-32) N/A .112-40 (#4-40) N/A .138-32 (#6-32)
Thread Code N/A 440 N/A 632 N/A 832 N/A 440 N/A 632
Length Code N/A 4 N/A 4 N/A 4 N/A 6 N/A 6
Material Code N/A A
Min. Sheet Thickness N/A .062 in
Blind Mounting Hole Diameter + .003 - .000 N/A .172 in N/A .213 in N/A .290 in N/A .172 in N/A .213 in
Min. Depth of Blind Hole1 N/A .043 in
L - Length ± .015 N/A .250 in a1395.jpg N/A .250 in a1395.jpg N/A .250 in a1395.jpg N/A .375 in a1395.jpg N/A .375 in a1395.jpg
A Max. N/A .041 in
E ± .010 N/A .205 in N/A .250 in N/A .328 in N/A .205 in N/A .250 in
C Max. N/A .171 in N/A .212 in N/A .289 in N/A .171 in N/A .212 in
Min. Dist. Hole C/L to Edge N/A .156 in N/A .188 in N/A .219 in N/A .156 in N/A .188 in
Max. Hole in Attached Parts N/A .135 in N/A .160 in N/A .185 in N/A .135 in N/A .160 in
For Use in Sheet Hardness2 N/A HRB 50 / HB 82 or less
Thread Specification N/A External, ANSI B1.1, 2A
Fastener Material N/A Aluminum
Standard Finish N/A
CAD Supplier N/A PennEngineering® (PEM®)
  • 1 Blind holes may be deeper than minimums except where sheet material is at or near minimum thickness. Fasteners should always be installed so the flange is flush with the surface of the sheet.
  • 2 HRB - Hardness Rockwell “B” Scale. HB - Hardness Brinell.